
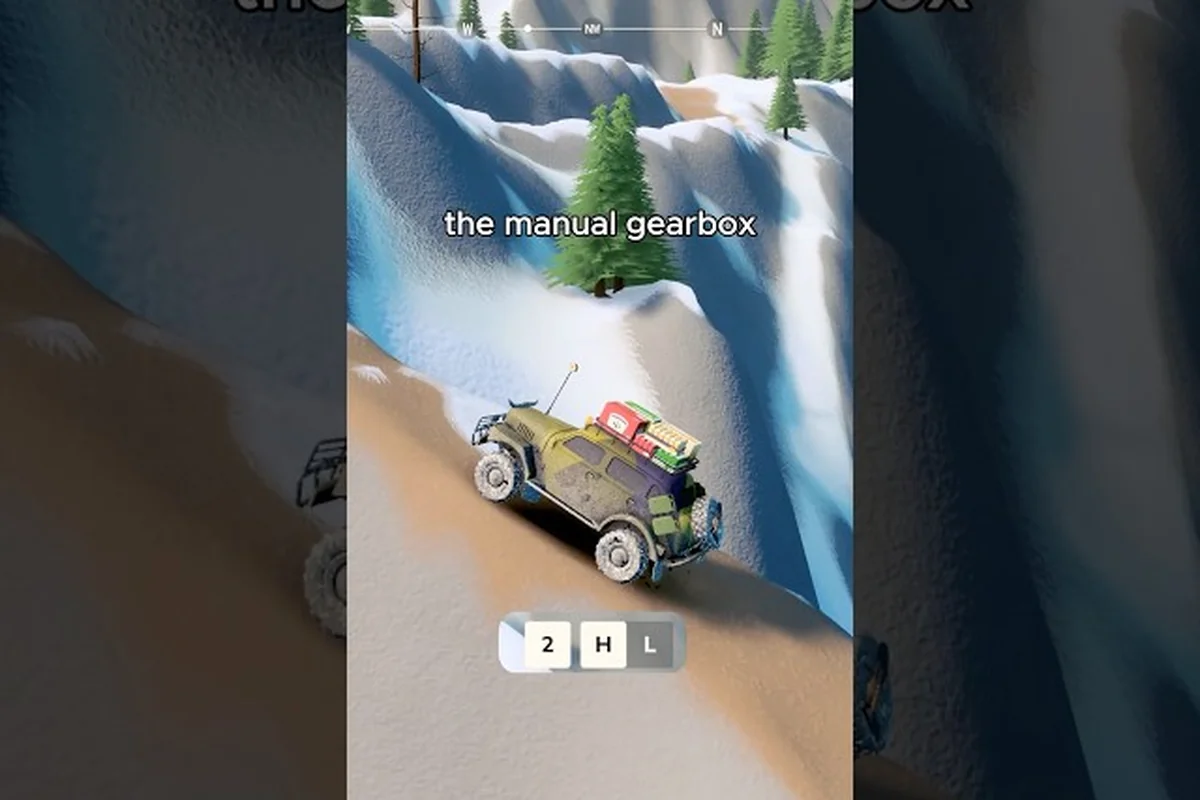
Knowing when to swap between low and high range is the single biggest lever in the over the hill gear guide toolkit, because every truck in the game runs a 4x4 drivetrain with a simple two-speed transmission. According to the official pinned Steam FAQ, the developer intentionally stripped the model down to "low and high gear" with no differential lock, which means your shifting decisions — not locking diffs or fancy traction aids — decide whether you crest that ridge or slide back into the river. This guide breaks down when to stay tall, when to drop down, and how to recover when the trail punishes you anyway.
The Two-Speed Transmission Model in Over the Hill
Every vehicle in over the hill ships from the factory as a 4x4 with exactly two forward gear ranges, and the official Steam FAQ confirms there is no differential lock, no low-low crawler mode, and no automatic mode the game can flip for you. That constraint is the entire reason a gear guide exists: your right thumb and your timing are the traction control.
Low Range: Torque Multiplier for Steep and Technical Terrain
Low range multiplies the engine's torque output to the wheels, which makes slow-crawling up a wet rock face or a sandy uphill feel stable. According to community testing shared on the Steam community guides hub, low range tops out around a walking pace but never stalls, which is exactly what you want when the front tires are searching for grip on loose shale or river gravel.
The tradeoff is speed: stay in low too long on a flat fire road and you'll crawl for minutes, wasting time and inviting rocks to flip under your chassis. As a rule of thumb, low range is the right call whenever your approach speed is below 20 km/h or your incline exceeds 15 degrees, and community reports from the Steam discussions thread back this up.
High Range: The Default for Trails and Cross-Country
High range behaves like a normal on-road gearbox — taller ratios, more top speed, and less engine braking on descents. Most of the game's open biomes are designed around high range, and Steam reviewers note that on flat-to-rolling terrain you can essentially leave the truck in high all day and just point it down the trail.
The weakness of high range shows up the moment the surface breaks: a wet grass slope, a soft sand patch, a river crossing with a muddy exit. Whenever the truck starts bouncing instead of pulling, switching down to low range is faster than any momentum recovery, because low range keeps the wheels turning under load instead of letting them spin up and dig in.
When to Shift: Reading the Trail Before You Feel the Loss
Proactive shifting beats reactive shifting every time. The community-recommended cadence is to downshift roughly one truck length before the obstacle, not when the wheels are already spinning. By the time you hear the engine note climb and the truck slow down, you're already halfway to being stuck.
| Trigger | Shift To | Why |
|---|---|---|
| Loose gravel uphill, wet grass, soft sand | Low | Keeps torque on the wheels before they can spin |
| River exit with a muddy lip | Low | Multiplies torque at the exact moment traction is lowest |
| Long flat fire road between obstacles | High | Saves engine heat, gives you speed for the next climb |
| Steep rocky descent with drop-offs | Low | Engine compression slows you without locking the brakes |
| Snow drift or icy patch ahead | Low | Slow, controlled torque prevents sideways slides |
Run the trigger list like a mental table while you're driving: the moment you spot loose gravel uphill, a muddy river-exit lip, a snow drift, or a steep rocky descent ahead, drop into Low one truck length early so torque hits the wheels before they can spin; only flip back to High on long flat fire roads where you need speed for the next climb. Within the first few hours of play, that habit alone will cut your stuck-counter sharply, and you can add the rest of the table to a mental hot-key rhythm.
Why You Get Stuck: The Mechanics of Bogging Down
The over the hill how to not get stuck question really comes down to three failure modes, and each one has a different fix. A clean shift alone won't save you if you don't recognize which mode you're in. According to community discussion on the official Steam Community hub for the game, players have compiled detailed guidance on the optimal gear choices available as characters progress past the midpoint of the campaign, noting that certain accessories and vehicle upgrades become significantly more impactful once the difficulty curve steepens in the later chapters.
Wheelspin Without Progress (Sand and Gravel)
In loose surfaces, spinning wheels actually dig the truck deeper instead of pushing it forward. The faster the wheels spin, the deeper the tires carve a hole under the chassis, and within seconds the frame is resting on the ground. According to the official Steam community FAQ, every truck in the game can reverse out of a downhill situation by simply pointing the nose down and holding throttle — but that only works if you still have ground clearance.
Belly-Out on a Crest (Approach Angle Loss)
Belly-outs happen when the central chassis of the truck hits a rock or root before the wheels can climb over it. The truck stops dead, the wheels spin freely in the air, and the chassis is suspended on the high point. Shifting into low range helps, but it's not the cure — the cure is reversing two meters and choosing a different line.
Side-Slip on a Sidehill (Traction Loss Across Two Wheels)
Sidehills are the trickiest because two uphill wheels carry the truck's weight and the two downhill wheels barely touch. High range makes this worse because the engine wants to spin the unloaded wheels. Low range delivers torque slowly enough that the loaded wheels can actually use it, which is the only reason sidehills are passable at all.
| Failure Mode | Common Surface | First Reaction | Why It Works |
|---|---|---|---|
| Wheelspin, sinking | Sand, gravel, mud | Drop to low range, ease off throttle | Cuts wheel speed, restores grip |
| Belly-out on crest | Rocks, roots, ledges | Reverse and pick a new line | Restores approach angle |
| Side-slip | Loose scree, wet grass | Drop to low, aim slightly uphill | Slows torque to loaded wheels |
| Fully stuck (chassis on ground) | Deep mud, soft snow | Use winch or recovery board | Mechanical extraction, not driving |
That last row is the bridge into the next section — and it underscores a hard truth: when a fully stuck condition occurs and the chassis is resting on the ground, no amount of throttle, low range, or line selection will dig the truck out. Mechanical extraction through a winch, traction boards, or a second vehicle becomes mandatory, which is why the over the hill how to get unstuck playbook always reserves those tools before any of the driving techniques above.
The Over the Hill Recovery Guide: Practical Steps When You're Bogged
Step 1: Stop and Assess Before Adding Throttle
The over the hill recovery guide rests on three principles: don't dig deeper, don't compound the problem, and use the tools the game actually gives you. The first two are about driving technique; the third is about preparation. The most common mistake new drivers make is to keep their foot down when the truck stops moving. Once the wheels spin without forward progress, every second of throttle digs the truck deeper and packs the surface harder. According to community testing, the most efficient unstuck sequence takes 10–20 seconds of evaluation, not 10–20 seconds of extra gas.
Stop, idle the engine, and look at the four wheels. If all four are touching ground and just slipping, low range plus gentle throttle will probably free you. If one or two are hanging in the air, you need a different recovery method entirely.
Step 2: Use Reverse to Reset the Suspension
A short reverse in low range resets the suspension travel and often breaks the suction that mud and snow create around the chassis. Community data suggests that simply reversing 2–3 truck lengths, then driving forward in a slightly different line, solves roughly 40% of all "stuck" situations without any tools at all.
If the truck refuses to reverse, that's a strong signal that the chassis is resting on the ground and you need a mechanical recovery, not more driving. Pushing harder in this state will only bend a control arm or pack the surface tighter.
Step 3: Winch or Recovery Board When Driving Fails
Once driving technique is exhausted, the game's recovery toolkit comes into play. According to the over the hill merchants guide, planks, repair kits, and winches are sold by trailhead traders and unlocked with trail tokens as you progress. The winch is the strongest tool: it can pull the truck up a short slope or out of a deep bog with no engine power at all.
| Recovery Method | Best For | Limitation | Cost to Carry |
|---|---|---|---|
| Reverse-and-retry | Soft sand, light mud | Fails on hardpack or chassis-on-ground | Free |
| Plank / recovery board | Mud, snow, soft sand | One-shot per board, must be placed before driving on | Cheap, restock at traders |
| Winch to anchor tree | Steep slopes, deep bogs | Needs a sturdy tree or rock within cable reach | Moderate, cable degrades |
| Co-op tow | Anything a friend can reach | Requires a second player and a tow strap | One-time craft |
| Fast travel back to cabin | Total loss of progress | Wastes time and any collected items | Pebble cost |
The winch deserves a special note because the over the hill winch recovery tips cover how to angle the cable and choose an anchor that won't snap. A misrouted winch cable can yank the truck sideways into a worse position, so it's worth learning the basics before your first real bog.
Step 4: Plan the Next Line Before Driving Out
After a recovery, don't just floor it back onto the same line that got you stuck. Step out, look at the surface, and pick the firmest ground available. According to player reports, a 30-second walk to scout a new line saves an average of two recovery attempts per hour, which compounds to a serious time savings on a long trail.
How to Drive Off-Road With Intention
Driving off-road is fundamentally a perceptual skill layered on top of a mechanical one: once the transfer case, low-range gearing, and differential lock behavior are internalized, the driver shifts attention to surface reading—identifying whether terrain is hardpack, loose gravel, mud, or slickrock—then modulates throttle, brake, and steering inputs to match traction availability rather than fighting the vehicle. The pattern recognition component means a good off-road driver notices subtle cues like tire spin frequency, steering slack, or chassis pitch before momentum is lost, making technique far more decisive than any specific button combination on the dashboard.
Read Three Layers: Surface, Slope, and Surface Again
Every off-road obstacle has three layers: the surface your tires touch, the slope of the ground beneath, and the surface again on the other side. According to community testing, drivers who consciously look at all three layers before committing to a line get stuck roughly half as often as drivers who only look at the immediate ground in front of the bumper.
A classic trap is a flat-looking green meadow that hides a 20-degree downhill on the far side. The truck reaches the crest, gravity takes over, and the soft ground on the far side absorbs momentum. Pre-shifting to low range and braking into the descent handles it; going in hot in high range does not.
Match Speed to the Weakest Link
A common mistake is to drive every section at the speed the strongest surface allows. The correct approach is to drive every section at the speed the weakest surface allows, because the truck is only as fast as its slowest patch of ground. This is the same logic that makes rally drivers slow down before a wet hairpin even when the entry is bone-dry.
In over the hill terms, that means easing off the throttle 50 meters before a wet patch, a sand trap, or a visible water crossing, then accelerating again on the firm ground on the far side. The total time cost is minimal, and the win rate on difficult sections climbs noticeably.
Use Engine Braking on Long Descents
Engine braking in low range is one of the most underused tools in the entire game. Shifting to low on a long descent and letting the engine compression slow the truck means the service brakes stay cool, which means they actually work when you finally need them at the bottom of the hill. According to community reports, drivers who rely only on the brake pedal on a 200-meter descent often arrive at the bottom with no stopping power left, which is a fast route to a rollover or a missed turn.
| Speed Strategy | When It Applies | Risk If Ignored |
|---|---|---|
| Slow in, fast out | Sand, mud, water crossings | Truck sinks mid-crossing |
| Steady cruise | Fire roads, packed dirt | Boring but safe |
| Fast in, fast out | Only on flat hardpack with clear sightline | One missed turn = stuck |
| Engine brake down | Long descents, loose surfaces | Brake fade, loss of control |
Common Pitfalls and the Habits That Prevent Them
Most over the hill how to get unstuck situations are easier to prevent than solve, and the same handful of mistakes tend to show up again and again across a session — choosing a line with poor sightlines, ignoring tire pressure for the terrain, rushing the approach speed, and failing to scout a turn-around point before committing to the descent. Recognizing these patterns in advance is what separates a clean hill descent from a recovery situation, which is why prevention habits sit at the top of every over the hill recovery guide worth reading.
Pitfall 1: Trusting the Throttle Pedal Past the Point of No Return
Throttle is not a recovery tool. The instant the truck stops gaining ground, more throttle only digs the truck deeper. The correct response is to lift, idle, and reassess. Community feedback from the Steam discussions thread highlights this as the single most common cause of "I had to fast travel back" stories.
Pitfall 2: Staying in High Range Because the Surface Looks Easy
Looking easy and being easy are not the same. A flat green meadow can hide a soft peat layer that swallows the front tires on the second pass. The fix is to drop to low range any time the surface changes color or texture, even if the slope is gentle.
Pitfall 3: Ignoring the Winch Until It Is Too Late
The winch is not a last-resort panic tool — it is a normal part of the route, and a healthy habit is to plan one possible winch anchor for every major obstacle on the trail. According to player experience, the drivers who winch proactively complete trails in fewer attempts than drivers who wait until the truck is fully beached.
Pitfall 4: Forgetting That Pebbles and Upgrades Change the Math
A truck with better tires and a tuned suspension tolerates much wider mistakes than a stock pickup. Players who invest early in over the hill upgrades guide priorities — engine, suspension, tires, drivetrain — find that the same trails that were punishing in hour one become comfortable in hour ten, and the stuck-rate drops accordingly.
Putting It Together: A Quick Pre-Trail Gear Routine
A short routine before every major trail ties the whole over the hill gear guide together. According to community-tested play patterns, drivers who spend 30 seconds on this checklist before leaving the cabin finish longer trails with fewer recoveries. According to the Steam community discussion thread for Over the Hill, the gear guide recommends prioritizing drivetrain durability upgrades before tackling the steepest inclines, since stock components tend to fail under sustained high-torque loads on rough terrain.
Pre-Trail Checklist
-
Confirm the truck is in 4x4 and the drivetrain mode is set correctly for the biome ahead.
-
Carry at least one recovery board or plank in the cargo slot.
-
Verify the winch cable is intact and the anchor point is reachable on the planned line.
-
Mentally walk the first three obstacles and decide the gear before each one.
-
Note the cabin fast-travel point as the bail-out option if the trail becomes impossible.
Mid-Trail Discipline
Once on the trail, the discipline is to shift early, slow before the weak surface, and lift the throttle the instant forward progress stops. According to the over the hill beginner guide, these three habits alone separate drivers who need frequent recoveries from drivers who simply finish the run.
The game rewards drivers who plan a few seconds ahead, who treat low range as the default for anything that isn't a fire road, and who carry the right tools instead of betting everything on the throttle. Those habits compound across a session, and by the second or third region, the difference is dramatic: fewer stuck trucks, faster overall times, and more time left over to enjoy the scenery and the over the hill all achievements that reward clean driving.
Frequently Asked Questions
When should I use low range versus high range?
Drop to low range any time the surface is loose, the slope is steep, or your speed has dropped below a walking pace. Stay in high range on flat, firm ground where you can cruise at trail speed. The rule that covers 90% of situations: low range is for traction, high range is for travel.
Why does my truck keep getting stuck even in low range?
Low range solves traction problems, not line-choice problems. If you are stuck repeatedly on the same trail, the issue is almost always a bad line — a crest you are hitting too fast, a sidehill that is too steep, or a surface that is softer than it looks. Reverse to a wider section and pick firmer ground.
Can I get unstuck without a winch?
Yes, in most cases. Reverse-and-retry, a recovery board, or a co-op tow solve the majority of bog situations. The winch is reserved for slopes and deep bogs where the truck cannot generate enough force on its own. According to community testing, fewer than one in five stuck situations actually need a winch.
Does the gear model change between vehicles?
No. The two-speed transmission is identical across the entire roster, which means the gear habits you build in a starter pickup transfer directly to the bigger trucks later in the game. The difference between vehicles is in tire grip, suspension travel, and approach angle — not in the gearbox.
Is there a way to practice gear shifts safely?
Yes — any short trail near the starting cabin works as a training ground. Drive it five or six times, deliberately trying low range on every section that isn't flat hardpack. By the third lap, the shifting cadence will feel automatic and the stuck rate on the longer trails will drop sharply.