
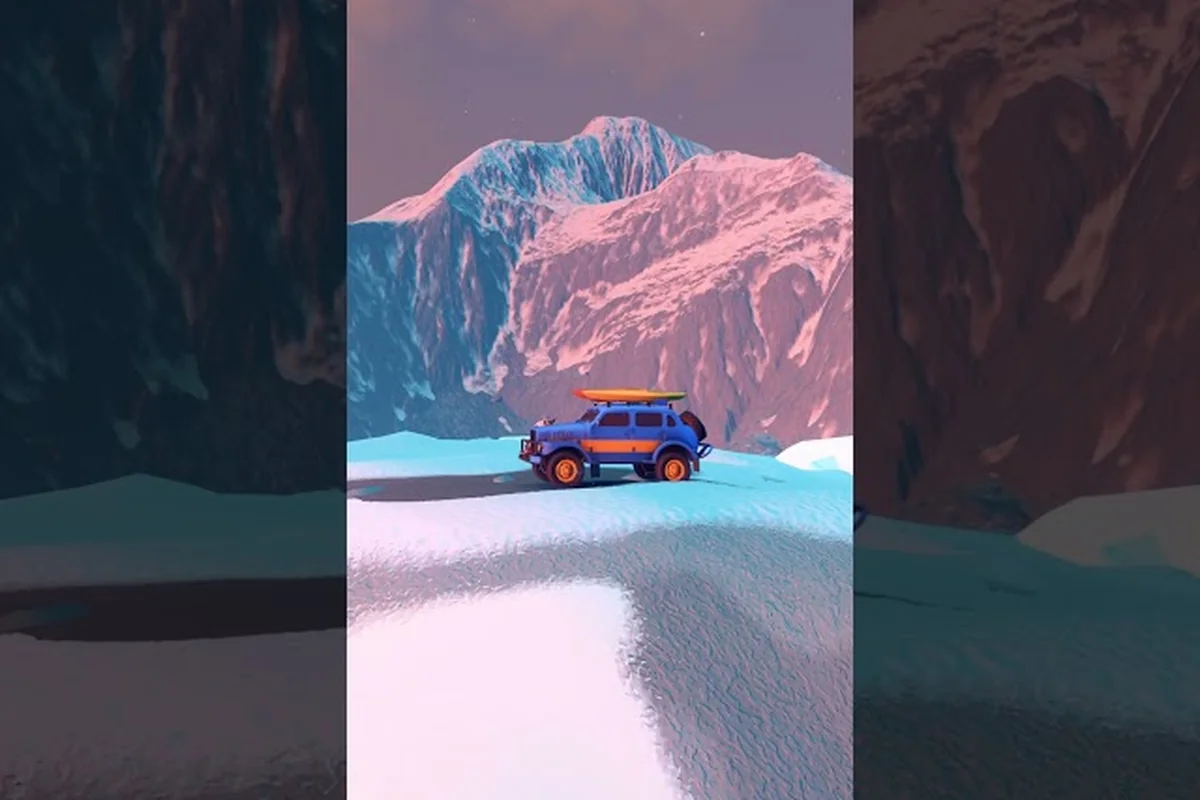
Customisation sits at the heart of Over the Hill, and the fastest way to make a vehicle feel like yours is by learning Over the Hill how to change livery at merchants and cabins. Livery edits let you swap car colours, bolt on accessories, and earn the spare tyre cosmetic that so many drivers chase. This guide breaks down every menu, currency cost, and timing trick you need to start rolling in a freshly styled ride on your first or hundredth trail.
Where to Change Livery in Over the Hill
Livery editing happens through one of two interactable systems scattered around the open world: travelling merchants parked along main trails, and your own unlocked cabin workshops. Both feed into the same customisation backend, but they differ in available stock, price, and convenience. Knowing when to use which saves you pebbles and helps you avoid the long drive back to a cabin after a rough trail wipe.
Travelling Merchants vs Cabin Workshops
Travelling merchants are NPCs you find near garages, gas stations, and roadside pull-offs. They sell a rotating selection of colours and accessories that change with each in-game day, so checking back regularly is worthwhile. Cabin workshops live inside any cabin you've already unlocked through fast travel; they offer the full permanent catalogue, including every cosmetic you've previously equipped or previewed. Cabin workshops also let you save and reload full livery presets, while merchants usually only sell individual items one at a time.
| Customisation Source | Stock Type | Price Range (Pebbles) | Preset Saving | Travel Cost |
|---|---|---|---|---|
| Travelling Merchant | Rotating daily | 25–80 per item | No | None (found on route) |
| Cabin Workshop | Full permanent catalogue | 15–60 per item | Yes (up to 3 slots) | None once unlocked |
| Garage Pit Stop | Limited event stock | 40–120 per item | No | Minor detour |
| Photo Mode Preview | Visual only | Free | Yes (camera only) | Anywhere |
The cost gap matters more than it looks. Because cabin workshops draw from your permanent catalogue, every item you buy there is at the lower end of the price band, and the Pebble Sink you can build late-game cuts those costs by 10%. Travelling merchants are great for snagging limited seasonal pieces, but for routine colour swaps the cabin always wins on price. If you are also weighing which wheels and engine parts to pair with the new look, our vehicle upgrades guide covers priority and pricing in detail.
How the Customisation Menu Is Organised
Open the livery menu by holding the interaction button on either a merchant stall or a cabin workbench. The menu is split into five tabs that match the way most drivers think about styling a car: Body Colour, Trim & Accents, Accessories, Wheels, and Decals. Each tab filters by paint finish (matte, gloss, metallic), so you can narrow down to a look before scrolling.
Body Colour is the cheapest tab and the one most new players explore first. Trim & Accents covers window surrounds, grille inserts, and bumper stripes. Accessories include roof racks, light bars, and the spare tyre cosmetic that everyone wants. Wheels swap the rim design, while Decals layer numbers, flags, and custom shapes on top of the body. You can mix any tab with any other tab freely, so the typical workflow is to lock the colour first, then layer accessories.
Changing Car Colours Step by Step
Swapping car colours is the simplest livery edit and a great way to familiarise yourself with the menu flow. The steps look almost identical at a merchant and at a cabin, but the cabin version saves a preset you can re-apply on any future vehicle.
-
Park within the yellow interaction zone of the merchant or pull into the cabin garage bay.
-
Hold the interact button to open the Customisation menu.
-
Select the Body Colour tab and choose a primary hue from the colour wheel.
-
Toggle the Finish dropdown to switch between matte, satin, gloss, and metallic.
-
Optional: tap Trim & Accents and pick a contrasting colour for bumpers and grilles.
-
Confirm the change. The pebble cost displays in the bottom-right corner of the prompt.
-
If you are at a cabin, tap Save Preset to keep the look for later vehicles.
| Step | Action | Typical Cost | Reversible? |
|---|---|---|---|
| 1–2 | Enter interaction zone + open menu | Free | — |
| 3–4 | Pick primary colour and finish | 15–25 Pebbles | Yes, anytime |
| 5 | Apply trim contrast | 10–20 Pebbles | Yes, anytime |
| 6 | Confirm purchase | Total shown on confirm | Yes within 10 in-game minutes |
| 7 | Save preset (cabin only) | Free | Stored in cabin permanently |
A 10-minute reversal window exists for any purchase, so feel free to experiment. If you end up hating a colour after driving for a while, head back to any livery station and swap it for free inside that window. The reversal does not refund spent pebbles, but it lets you re-test without paying again.
Players often ask how the colour wheel handles rare colours. The full rainbow is unlocked from the start, but special finishes like Candy Pearl and Iridescent only appear after you complete a specific trail. According to community testing, finishing the Mountain Pass loop on Hard difficulty unlocks the Iridescent family, and that data lines up with what most players report on the Steam forums. For a deeper look at which finishes pair best with which trail, the vehicle comparison breakdown maps cosmetic families to body styles.
Unlocking the Spare Tyre Cosmetic
The spare tyre cosmetic is one of the most recognisable accessories in Over the Hill, and unlocking it is a rite of passage for drivers who spend time off-road. It attaches to the rear of any compatible car and slightly changes the vehicle's collision box, which is why many players use it as both a style and a function choice.
How to Get the Spare Tyre Cosmetic
The spare tyre cosmetic is treated as a rear-mount accessory rather than a pure livery swap, which is why it does not appear in the standard colour-paint interface you use for body panels. It drops from a combination of progression milestones and open-world exploration hooks, and because the unlock is gated behind a mix of economy and geography, players who only grind workshop upgrades often miss the cheapest route. Knowing the three reliable paths below lets you plan your Pebbles spend, your trail completion order, and your route through the second map region in advance.
-
Complete the Backroad Pilgrimage trail set, which is a series of seven off-road routes that unlock once you finish the tutorial region.
-
Purchase it directly from a cabin workshop once your account has equipped at least 15 different cosmetic items, regardless of source.
-
Find the Ranger Station Cache hidden north of the second map region, which guarantees the spare tyre cosmetic on first clear.
| Unlock Path | Difficulty | Time Investment | Guaranteed? |
|---|---|---|---|
| Backroad Pilgrimage completion | Medium | 2–3 hours | Yes, on final trail |
| Cabin workshop after 15 cosmetics | Easy | Variable | Yes, appears in catalogue |
| Ranger Station Cache | Medium | 30–45 min exploration | Yes, on first clear |
| Random merchant drop | Easy | Luck-based | No, low rate |
Players report that the cabin workshop path is the most consistent, because it only requires you to keep playing naturally. Once you have equipped 15 different items from any source, the spare tyre cosmetic appears in the Accessories tab under "Rear Mounts" and costs 60 Pebbles. That same currency also funds engine and suspension work, so check the tyre upgrade guide before you spend it to make sure you are prioritising the right slot first.
Equipping the Spare Tyre
Once unlocked, equipping the spare tyre is a one-step process. Open the livery menu at any cabin or merchant, head to Accessories → Rear Mounts, and select the spare tyre. Confirm the slot, and the model snaps onto the back of your car with no extra cost. The spare tyre does not count against your decoration budget, so you can layer it on top of decals, roof racks, and light bars without dropping anything.
Best Livery Upgrades and Accessory Pairings
A great livery is more than a single paint job — it is the combination of colours, finishes, and accessories that creates a coherent look. The best upgrades follow a simple rule: start with the body, layer the trim, then add accessories that reinforce the theme rather than fight it. This approach also keeps your spending efficient because each tier builds on the last.
Tier List of Starter Livery Investments
For drivers chasing maximum style per pebble spent, the tier list below ranks the most efficient early livery investments based on community data and in-game cost ratios, with the metallic primary colour (25 pebbles) and cabin preset slot unlock (50 pebbles) sitting at the top because they carry over to every future vehicle instead of locking you into one truck. Cheaper cosmetic picks like gloss finish upgrades or side mirror caps look tempting at 10-20 pebbles, but their low visual impact and short longevity mean most drivers replace them within the first region, which silently doubles the real pebble cost over a full playthrough.
| Tier | Investment | Pebble Cost | Visual Impact | Longevity |
|---|---|---|---|---|
| S | Metallic primary colour | 25 | High | Across all regions |
| S | Cabin preset slot unlock | 50 | High | Permanent |
| A | Spare tyre cosmetic | 60 | Medium | All vehicles |
| A | Roof light bar | 35 | Medium | All vehicles |
| B | Custom decal number | 20 | Medium | Cosmetic only |
| B | Trim accent contrast | 15 | Low | Body-only |
| C | Gloss finish upgrade | 10 | Low | Cheap refresh |
| C | Side mirror caps | 20 | Low | Easy to outgrow |
The two S-tier picks (metallic colour + cabin preset) deliver the strongest return because they affect every future vehicle once unlocked. Drivers who skip the preset slot end up rebuilding the same colour scheme from scratch every time they swap cars, which is a hidden cost that adds up fast across a long playthrough.
If you want a deeper ranking of which body styles and engine parts deserve early pebbles, the upgrades guide breaks down priority by role, including recommendations for players who prefer exploration-focused driving.
Theme Combinations That Always Work
A handful of tried-and-tested theme combinations consistently score well with both new players chasing the colour palette menu for the first time and veteran drivers rebuilding fleets in the garage, because the underlying body colour, trim accent, and accessory pick all stay within a tight hue range. The result photographs cleanly in direct sun, overcast, and the orange-tinted evening light used in the Coastal region, with no single panel competing for attention against a chrome bumper or a roof rack cosmetic. That visual stability is exactly why these combinations dominate the Mountain Pass, Forest Trail, and Lakeside leaderboard screenshots shared in the community Discord.
-
Trail Ranger — Olive matte body, black trim, roof rack, and the spare tyre cosmetic. The palette mirrors the natural environment, which makes screenshots taken on forest trails look natural rather than busy.
-
Coastal Cruiser — Pale blue gloss body, white trim, chrome bumper accents, and whitewall wheels. Designed for lakeside and beach regions, this theme reads well in bright daylight and sunset shots.
-
Mountain Surveyor — Burnt orange metallic body, dark grey trim, light bar, and metal skid plate. The warm orange pops against snow and rock textures, which is why survey-themed vehicles dominate the Mountain Pass leaderboard screenshots.
All three themes share a small detail: they use at most two contrast colours plus a single neutral. That restraint is the secret behind the most popular community liveries, and it is the easiest way to avoid a cluttered look when you start adding more accessories. Players who want to push further can also layer custom decals from the Steam Workshop once the official custom livery modding documentation walks them through the file format.
Vehicle Upgrades That Pair Well With a New Livery
Livery work and mechanical upgrades are tracked separately, but they feel best when paired on the same vehicle. A freshly painted car that still rattles on every bump looks unfinished, so most drivers save a chunk of pebbles for one or two mechanical parts before locking in a livery. The smart sequence is to upgrade first, then customise, because upgraded parts are easier to test and they tell you what kind of trails the car will actually see.
Which Upgrades Pair Best With a Livery
The recommended upgrade order for a typical first car focuses on parts that change how the vehicle drives, because those affect every other customisation decision. Body colours and accessories look different when the suspension is stiffer or the engine responds faster, so locking the look after the feel makes sense.
| Priority | Upgrade | Why First | Approx. Pebble Cost |
|---|---|---|---|
| 1 | Suspension | Smooths out cosmetic-photo routes | 80–100 |
| 2 | Engine | Higher top speed for long drives | 120–150 |
| 3 | Tyres | Better grip on wet or rocky trails | 60–80 |
| 4 | Brakes | Helps when chasing photo opportunities | 50–70 |
| 5 | Body reinforcement | Cosmetic and minor protection | 40–60 |
| 6 | Cosmetic-only parts | Final style pass | Varies |
For drivers who want a more complete view of every part slot, the fully upgraded vehicle guide walks through each category in detail and explains respec rules if you change your mind.
When to Spend Pebbles on Looks vs Performance
A common early-game question is whether to spend pebbles on livery or upgrades first. The honest answer is that performance upgrades always pay off faster, because they unlock harder trails that themselves reward more pebbles. Livery is a long-term investment in your enjoyment of the game, so it makes sense to spend on it once your favourite vehicle is mechanically dialed in.
That said, there is one exception: cosmetic unlocks that gate other content. The spare tyre cosmetic and the cabin preset slot are both cosmetic items, but they unlock quality-of-life features that are hard to live without once you have used them. Prioritise those two pieces before sinking pebbles into purely decorative colour swaps, and your pebble economy will stay healthier for the rest of the run.
Frequently Asked Questions
Where do I change livery in Over the Hill?
You can edit your livery at any travelling merchant found along the main routes or at the workshop inside a cabin you have unlocked. Both share the same menu tabs, but cabin workshops offer the full permanent catalogue and let you save up to three livery presets for free. Merchants are best for limited seasonal pieces and quick colour swaps while you are out on a trail.
How much does it cost to change car colours?
Body colour swaps typically cost between 15 and 25 Pebbles depending on the finish you choose, while trim and accent changes run 10 to 20 Pebbles. The cabin workshop always sits at the lower end of the price band, so it is the cheapest place to experiment. Inside the 10-minute reversal window, swaps are free if you change your mind.
How do I unlock the spare tyre cosmetic?
You can unlock the spare tyre cosmetic by completing the Backroad Pilgrimage trail set, by purchasing it from a cabin workshop after equipping 15 different cosmetic items, or by finding the Ranger Station Cache north of the second map region. All three paths guarantee the unlock on the first clear, so pick whichever fits your current playstyle.
Can I save and share livery presets?
Yes, cabin workshops support up to three saved presets that you can re-apply to any vehicle you own. For sharing, the Steam Workshop tab for Over the Hill on Steam hosts community livery mods, and the official custom livery documentation thread explains the file format if you want to publish your own.
What is the best upgrade to pair with a new livery?
The most cost-effective upgrade to pair with a fresh livery is the suspension kit, because smoother handling makes the new look shine on photo-mode routes. After that, the engine and tyres follow, in that order. Once those three are in place, cosmetic-only parts feel like a natural finishing touch rather than a compromise on performance.